Honey Glazed Chicken – The Ultimate, Deep-Dive Culinary Guide
Introduction & Background
Honey Glazed Chicken is a dish that perfectly represents the harmony between sweet and savory cooking. At first glance, it may seem like a simple preparation—chicken coated in a honey-based sauce—but when done properly, it becomes a layered, complex, and deeply satisfying dish that appeals to a wide range of palates.
The use of honey in cooking dates back to ancient civilizations, long before refined sugar was widely available. Honey was prized not only for its sweetness but also for its ability to enhance flavors and preserve food. In ancient Egypt, Greece, and China, honey was frequently used in meat dishes, often combined with herbs, spices, and fermented sauces.
As culinary traditions evolved, different cultures adapted honey-based glazes in unique ways. In Asian cuisine, honey was paired with soy sauce, garlic, and ginger to create umami-rich marinades. In European cooking, honey was often combined with mustard, vinegar, and butter to create rich, tangy glazes. Modern Honey Glazed Chicken draws inspiration from all of these traditions, resulting in a dish that feels both global and familiar.
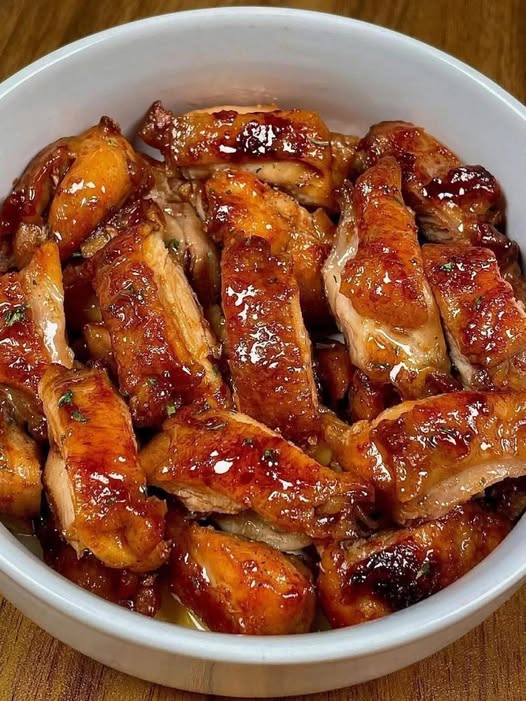
What makes this dish especially popular today is its versatility. It can be baked, pan-seared, grilled, or air-fried. It can be made spicy, tangy, smoky, or purely sweet depending on preference. Most importantly, it consistently delivers a glossy, caramelized coating that makes it visually appealing and incredibly satisfying to eat.
This guide is designed not just to show you how to cook Honey Glazed Chicken, but to help you understand the science, technique, and artistry behind it, so you can consistently achieve restaurant-quality results at home.
Chef’s Philosophy & What Makes This Version Exceptional
Cooking Honey Glazed Chicken at a high level is about more than just following a recipe—it’s about understanding balance, timing, and texture.
The first principle is flavor balance. Honey provides sweetness, but without contrast, that sweetness can quickly become overwhelming. That’s why this recipe incorporates soy sauce for saltiness and umami, garlic for depth, and a touch of acidity (vinegar or lemon juice) to cut through the richness. The result is a glaze that is not just sweet, but layered and complex.
The second principle is heat control. Honey is delicate when exposed to heat. At high temperatures, it can burn quickly, turning bitter. The key is to cook the chicken first and apply the glaze in stages, allowing it to caramelize gradually rather than scorch.
The third principle is texture contrast. The chicken should have a slightly crisp outer surface so the glaze adheres properly. Meanwhile, the inside should remain juicy and tender. Achieving this balance requires proper preparation, correct cooking temperature, and resting time.
Finally, there is layering of flavor. Instead of relying entirely on the glaze, the chicken itself is seasoned and optionally marinated beforehand. This ensures that flavor exists throughout the dish, not just on the surface.
This approach transforms a simple dish into something that feels carefully crafted and deeply satisfying.
Difficulty, Timing & Yield
- Difficulty Level: Easy to Medium
- Preparation Time: 25–30 minutes
- Marination Time: 30 minutes to 2 hours (optional but highly recommended)
- Cooking Time: 35–45 minutes
- Resting Time: 5–10 minutes
- Total Time: Approximately 1 hour 30 minutes
- Servings: 4–6 portions
Ingredients
For the Chicken
- 800g to 1 kg chicken (thighs, drumsticks, or breast pieces)
- 1 teaspoon salt
- 1/2 teaspoon black pepper
- 1 teaspoon paprika
- 1 teaspoon garlic powder
- 1/2 teaspoon onion powder
- 1 tablespoon oil
For the Honey Glaze
- 1/2 cup honey
- 3 tablespoons soy sauce
- 4–5 cloves garlic, finely minced
- 1 tablespoon butter
- 1 tablespoon vinegar or lemon juice
- 1 teaspoon grated ginger (optional)
- 1/2 teaspoon chili flakes (optional)
- 1 tablespoon water (if needed for consistency)
Optional Garnishes
- Sesame seeds
- Fresh chopped parsley
- Green onions
Step-by-Step Instructions
Step 1: Preparing the Chicken
Start by washing the chicken and patting it completely dry using paper towels. Moisture is the enemy of crispness, so this step is essential.
Place the chicken in a large mixing bowl. Add salt, black pepper, paprika, garlic powder, onion powder, and oil. Mix thoroughly until every piece is evenly coated.
If possible, let the chicken marinate for at least 30 minutes. For deeper flavor, marinate for up to 2 hours in the refrigerator. This allows the seasoning to penetrate into the meat, enhancing both taste and tenderness.
Before cooking, let the chicken sit at room temperature for about 10–15 minutes to ensure even cooking.
Step 2: Preheating and Cooking Setup
Preheat your oven to 200°C (390°F). If using a stovetop method, heat a large skillet over medium heat.
Line a baking tray with parchment paper or lightly grease it. This prevents sticking and makes cleanup easier.
Step 3: Initial Cooking of the Chicken
Arrange the chicken pieces in a single layer on the tray or pan. Avoid overcrowding, as this can cause steaming instead of browning.
Cook the chicken for about 20–25 minutes in the oven, flipping halfway through. If using a pan, cook for about 12–15 minutes, turning occasionally.
At this stage, the chicken should be mostly cooked and lightly golden. This forms the base for the glaze to stick to.
Step 4: Preparing the Honey Glaze
In a small saucepan, melt butter over low heat.
Add minced garlic and cook gently for about 1 minute until fragrant. Avoid browning too much, as burnt garlic can ruin the flavor.
Pour in honey and soy sauce. Stir continuously to combine.
Add vinegar or lemon juice to balance the sweetness. If using ginger and chili flakes, add them now.
Let the mixture simmer gently for 3–5 minutes. The glaze should thicken slightly and become glossy. If it becomes too thick, add a small amount of water.
The final consistency should be thick enough to coat a spoon but still pourable.
Step 5: Applying the First Layer of Glaze
Remove the chicken from the oven or pan.
Using a brush or spoon, coat each piece of chicken with the glaze. Make sure all sides are covered.
Return the chicken to the heat source.
Step 6: Building Layers of Flavor
Cook for another 5–7 minutes, then remove and apply another layer of glaze.
Repeat this process once or twice more. This layering technique builds a thicker, richer coating and enhances caramelization.
Step 7: Final Caramelization
During the final 10–15 minutes of cooking, the glaze will begin to caramelize.
The chicken will develop a shiny, sticky exterior with slightly darkened edges. This is where the flavor intensifies the most.
Keep a close eye to prevent burning, especially if using high heat or broiling.
Step 8: Resting the Chicken
Once the chicken is fully cooked, remove it from heat and let it rest for 5–10 minutes.
This step allows the juices inside the chicken to redistribute, ensuring that the meat remains moist and tender.
Serving Suggestions
Serve the Honey Glazed Chicken hot, garnished with sesame seeds or fresh herbs.
It pairs well with:
- Steamed rice
- Fried rice
- Garlic noodles
- Roasted vegetables
- Mashed potatoes
- Fresh salad
Drizzle any remaining glaze over the chicken before serving for extra flavor.
Pro Tips for Perfection
- Dry the chicken thoroughly before seasoning
- Use multiple layers of glaze for better flavor
- Control heat carefully to prevent burning
- Let the glaze thicken slightly before applying
- Rest the chicken before serving
Common Mistakes to Avoid
- Burning the glaze due to high heat
- Using too much honey without balancing flavors
- Overcooking the chicken
- Skipping seasoning on the chicken
- Applying glaze too early in the cooking process
Variations You Can Try
You can customize Honey Glazed Chicken in many ways:
- Add orange juice for a citrus version
- Use mustard for a tangy twist
- Add chili sauce for spice
- Grill instead of baking for a smoky flavor
- Use an air fryer for crispiness
Understanding the Science Behind the Dish
Honey caramelizes because of its natural sugars. When heated, these sugars break down and form complex flavors and a darker color. This is what gives the glaze its signature appearance and taste.
The addition of soy sauce introduces umami, which enhances the overall depth of flavor. Garlic adds aromatic compounds, while acidity balances sweetness and prevents the dish from becoming too heavy.
Understanding this balance allows you to adjust the recipe according to your preference without losing its essence.
Storage and Reheating
Store leftover Honey Glazed Chicken in an airtight container in the refrigerator for up to 3 days.
To reheat, use an oven or pan over low heat. Avoid microwaving for too long, as it can dry out the chicken.
You can also add a small amount of water or glaze while reheating to restore moisture.
Final Thoughts
Honey Glazed Chicken is a perfect example of how simple ingredients can come together to create something extraordinary. It offers a balance of sweetness, savoriness, and richness, combined with a satisfying texture.
When prepared with attention to detail, it becomes more than just a meal—it becomes an experience. The glossy glaze, the tender meat, and the deep flavors make it a dish that people remember.
Whether you’re cooking for yourself, your family, or guests, this recipe delivers consistency, flavor, and visual appeal every time.
Leave a Reply