Sugar Free Banana Pudding – Recipe
Introduction & Background
The Sugar Free Banana Pudding is a modern reinterpretation of one of the most iconic comfort desserts in Western culinary culture. Traditionally, banana pudding is known for its rich sweetness, creamy custard base, vanilla wafers, and soft banana layers. It originated and became especially popular in Southern American cuisine, where it evolved into a staple dessert served at gatherings, family events, and bakeries.
However, the classic version relies heavily on refined sugar, condensed milk, and processed cookies—making it delicious but nutritionally heavy and often unsuitable for low-sugar or fitness-focused diets.
This sugar-free version transforms the dessert into a controlled nutrition-friendly custard system without losing its signature creaminess, banana aroma, and layered comfort texture.
Instead of refined sugar, sweetness is rebuilt using natural banana sugars, sugar substitutes, and dairy balance engineering, creating a dessert that feels indulgent while remaining light on blood sugar impact.
The goal of this recipe is not to “remove sugar” in a simple way—it is to rebuild sweetness architecture using natural and functional ingredients.
Chef’s Philosophy & Functional Dessert Engineering
This dessert is designed as a layered nutritional system, not just a pudding.
Each component is engineered with purpose:
- One layer builds natural sweetness
- One layer provides cream structure
- One layer creates banana flavor depth
- One layer adds texture contrast
Unlike traditional banana pudding, where sugar dominates the profile, this version relies on ingredient interaction and ripeness science.
1. Natural Sweetness Engineering (No Refined Sugar Strategy)
Instead of sugar, sweetness is created using:
- Ripe bananas (natural fructose release)
- Sugar-free sweeteners (erythritol, stevia, or monk fruit blends)
- Vanilla extract (perceived sweetness enhancer)
The key concept is perception-based sweetness, where aroma and texture enhance the feeling of sweetness without increasing actual sugar content.
2. Banana Ripeness Optimization System
Bananas are not just fruit—they are the primary sweetening engine.
Different ripeness levels affect the dessert:
- Light yellow → mild flavor, low sweetness
- Spotted ripe → balanced sweetness and structure
- Fully brown spotted → maximum sweetness, softer texture
This recipe is optimized for fully ripe bananas, because they naturally convert starch into sugar, eliminating the need for added sugar.
3. Custard Stability Without Sugar
In traditional custard, sugar helps:
- Stabilize texture
- Slow egg coagulation
- Improve mouthfeel
In this sugar-free version, stability is maintained using:
- Egg yolks (emulsion structure)
- Cornstarch (thickening control)
- Dairy fat (cream smoothness compensation)
This ensures the custard remains silky without relying on sugar chemistry.
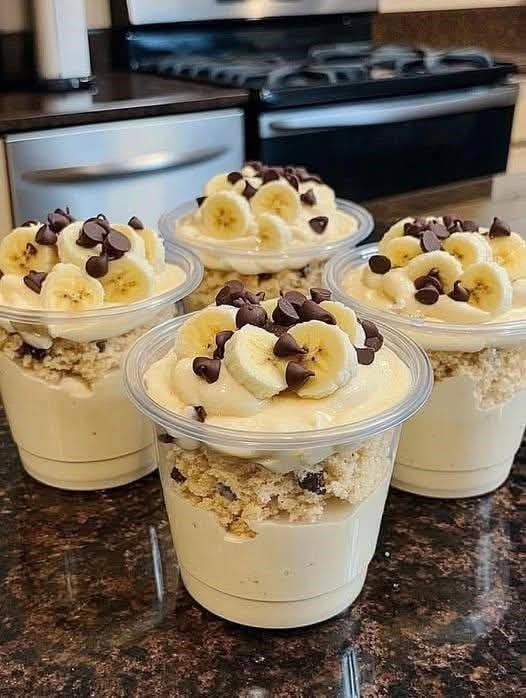
4. Texture Layer Engineering
A perfect banana pudding must feel multi-dimensional:
- Creamy custard base
- Soft banana slices
- Light whipped topping
- Optional crunchy layer substitute
Even without cookies, texture contrast is preserved through banana softness variation and chilled cream density differences.
Difficulty, Timing & Yield
Difficulty Level: Medium (custard control required)
Preparation Time: 25–30 minutes
Cooking Time: 15–20 minutes
Chilling Time: 4–6 hours
Total Time: ~6 hours
Servings: 6–8 portions
Ingredients (Fully Structured Breakdown)
Sugar Free Custard Base System
- 2 cups whole milk → hydration + light cream structure
- 1 cup heavy cream → richness + smooth mouthfeel
- 4 egg yolks → emulsification + thickening agent
- 2 tablespoons cornstarch → stability + texture control
- 1/2 cup sugar-free sweetener (erythritol or monk fruit blend) → sweetness replacement
- 1 tablespoon vanilla extract → aroma + dessert illusion of sweetness
- Pinch of salt → enhances banana and vanilla perception
Banana Flavor Core Layer
- 4–5 ripe bananas (sliced) → natural sweetness + texture foundation
- Optional: extra banana mashed (for custard infusion layer)
Bananas act as:
- Natural sweetener
- Flavor carrier
- Texture softener
Cream Layer System
- 1 cup heavy whipping cream → light topping structure
- 1–2 tablespoons sugar-free sweetener → stabilized sweetness
- Optional vanilla drop → aroma enhancement
Optional Low-Carb Texture Layer
Instead of wafers:
- Almond flour crumble
- Sugar-free biscuits
- Crushed nuts (walnuts or almonds)
- Coconut flakes
Step-by-Step Method (Advanced Custard Technique)
Step 1: Dry Custard Base Preparation
Mix together:
- Cornstarch
- Sugar-free sweetener
- Pinch of salt
This ensures:
- Even thickening
- No clumping in custard
- Stable base formation
Step 2: Egg Yolk Conditioning
Whisk egg yolks with a small portion of milk.
Purpose:
- Prevent scrambling during heat
- Begin emulsification process
- Prepare for thermal integration
Step 3: Dairy Heating Phase
Heat milk and cream gently.
Important rule:
DO NOT BOIL.
Ideal state:
- Steaming liquid
- No bubbling
This preserves:
- Fat structure
- Smooth custard formation
Step 4: Custard Formation Process
Slowly whisk dry mixture into warm milk.
Then temper egg yolks into mixture gradually.
This step creates:
- Smooth base
- Stable thickening reaction
- No grain texture
Step 5: Banana Integration Phase
Once custard thickens:
Add mashed banana into custard base.
This creates:
- Natural sweetness infusion
- Banana flavor fusion
- Creamy fruit-body texture
Optional: lightly blend for ultra-smooth pudding.
Step 6: Layer Assembly System
In serving dish:
- Add custard layer
- Add sliced bananas
- Repeat layering
This builds:
- Visual depth
- Flavor layering
- Texture balance
Step 7: Cream Topping Layer
Spread whipped cream on top once cooled.
This adds:
- Lightness
- Airy contrast
- Smooth finish
Step 8: Chilling Phase (Critical Stabilization)
Refrigerate for 4–6 hours.
During chilling:
- Custard firms
- Banana flavor intensifies
- Layers bond naturally
- Texture becomes spoonable perfection
Step 9: Final Rest Before Serving
Let sit for 5–10 minutes before serving.
This improves:
- Cream softness
- Banana aroma release
- Spoon texture glide
Advanced Chef Tips
- Use fully ripe bananas for maximum natural sweetness
- Do not overcook custard (prevents grainy texture)
- Add bananas only after slight cooling (prevents mush breakdown)
- Use glass dish for visible layering effect
- Chill overnight for best flavor fusion
Common Mistakes & Failure Analysis
- Watery pudding → under-thickened custard
- Bitter taste → too much sweetener or low banana ripeness
- Grainy custard → overheated egg yolks
- Mushy layers → overripe bananas or excessive mixing
Storage & Meal Prep Optimization
- Refrigerate: up to 3 days
- Best texture: first 48 hours
- Do not freeze (banana texture breaks down)
- Store covered to prevent oxidation
Final Thoughts
The Sugar Free Banana Pudding is not just a diet version of a dessert—it is a re-engineered comfort food system built on natural sweetness chemistry, dairy emulsification, and controlled texture layering.
It delivers:
- Natural banana sweetness
- Creamy custard richness
- Light whipped topping contrast
- Sugar-free nutritional balance
- Deep comfort dessert experience
It proves that even without refined sugar, dessert can still feel luxurious, satisfying, and emotionally comforting—if built with the right structure and food science principles.
Leave a Reply